
- Home
- Hot
- Products
- Application
- About Us
- Technical Guide
- News
- Contact Us
 English
Views: 0 Author: Site Editor Publish Time: 2026-09-30 Origin: Site


Dull or incorrectly specified blades cause immense operational headaches on the production floor. They lead directly to product damage, generate excessive crumb waste, and force unplanned maintenance downtime. Selecting a commercial bread slicing knife goes far beyond buying a simple consumable. It represents a vital operational decision deeply impacting your daily yield and the final visual presentation of your loaves.
This guide provides a clear framework for evaluating various blade materials and specific edge geometries. We will explore how to meet strict safety and compliance standards based on your daily production volume. You will learn exactly how to align your equipment choices with the specific bread types you bake, ensuring cleaner cuts and smoother operations.
Matching tooth profile to bread density (e.g., hard crust vs. soft crumb) minimizes tearing and yield loss.
A stainless steel bread slicer blade offers superior sanitation, while carbon steel provides longer edge retention—choice depends on facility wash-down protocols.
Proper blade tensioning and precise length matching are critical to preventing premature snapping and machine wear.
All selections must verify the use of a food grade slicer blade with traceability to meet FDA/NSF compliance.
Many bakeries treat blade replacement as an afterthought. However, running mismatched or low-quality blades triggers a cascade of costly production issues. The most immediate business problem manifests as poor slice quality. Dull edges compress the loaf before cutting it. This compression causes "feathering," where the edges of the bread look torn and frayed rather than cleanly severed. You will also see uneven slice thickness, making packaging difficult and frustrating your final consumers.
Yield loss directly impacts your revenue. When blades tear bread instead of slicing it cleanly, they generate excessive crumb waste. In high-volume environments, losing even a few extra grams of crumb per loaf translates to hundreds of lost kilos over a month. You are essentially turning sellable product into floor sweepings.
Beyond immediate product damage, poor blade selection accelerates machine wear and tear. Commercial slicing machines, such as those manufactured by Oliver, Berkel, or JAC, rely on precise tolerances. Dull blades force these machines to work significantly harder. The increased resistance transfers directly into the machine's drive system. This strain accelerates motor fatigue, wears out drive belts prematurely, and destroys bearings.
Primary Costs of Poor Blade Management:
Visual Degradation: Crushed crusts and feathered crumbs lower perceived product quality.
Direct Yield Reduction: Excessive crumb generation subtracts directly from your sellable weight.
Accelerated Mechanical Fatigue: Increased cutting resistance shortens the lifespan of slicer motors and internal bearings.
Unplanned Downtime: Sudden blade snapping halts production lines during peak shifts.
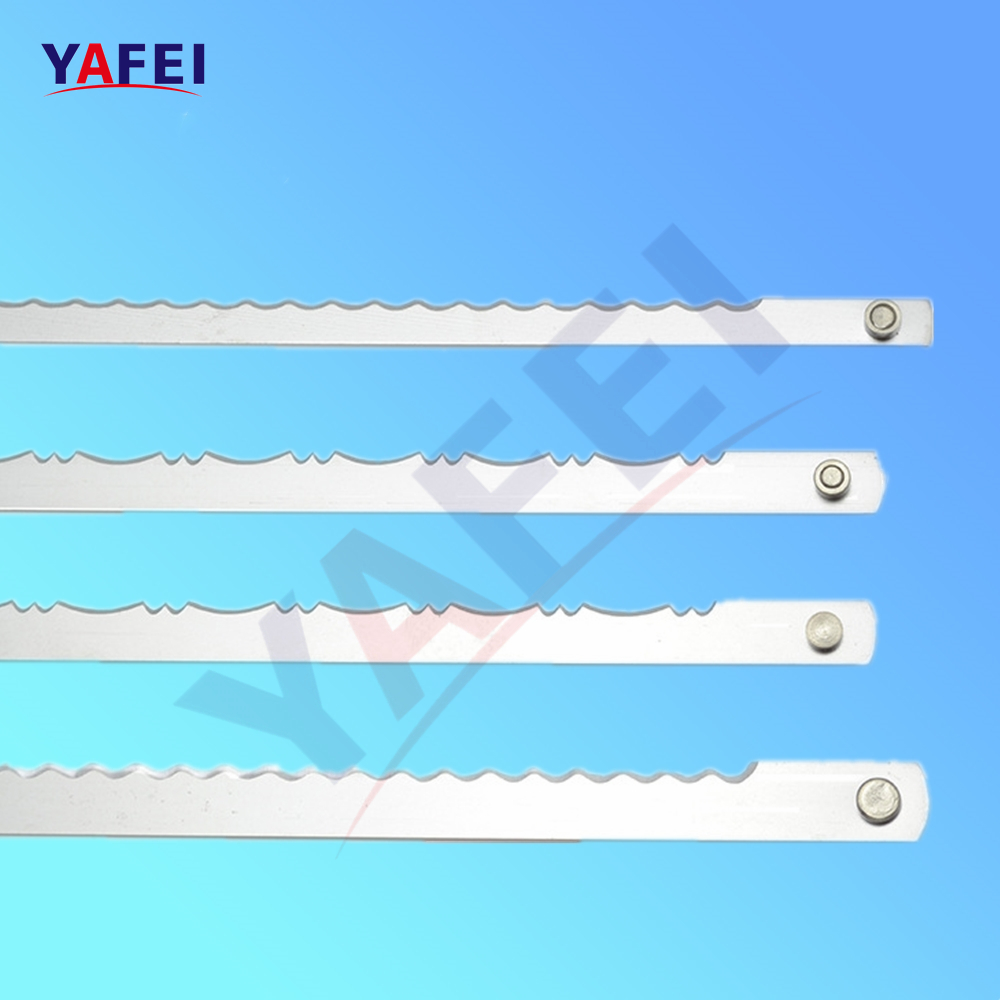
Choosing the correct core material dictates how long your blades last and how they interact with your facility's environment. The industry relies primarily on two metal types: high-carbon steel and stainless steel. Each material behaves differently under continuous industrial stress.
High-carbon steel delivers exceptional edge retention. It handles high-volume, continuous industrial slicing beautifully. The hard metal holds its sharpness longer than other alloys, reducing the frequency of blade changeouts. However, carbon steel is highly susceptible to rust. Exposure to moisture, high humidity, or acidic ingredients causes rapid oxidation. Using carbon steel requires strict environmental control and completely dry operating conditions.
Conversely, investing in a stainless steel bread slicer blade offers high corrosion resistance. This material is ideal for facilities enforcing strict wet-wash protocols or operating in high-humidity climates. You can sanitize these blades aggressively without fearing rust formation. The primary drawback involves hardness. Stainless steel is a slightly softer material than high-carbon steel. Consequently, it loses its edge faster and may require more frequent replacement cycles.
Material Decision Matrix Table:
Material Type | Edge Retention | Corrosion Resistance | Ideal Application Environment | Maintenance Requirement |
|---|---|---|---|---|
High-Carbon Steel | Excellent | Low | Dry, climate-controlled, continuous volume | Requires dry cleaning, susceptible to rust |
Stainless Steel | Moderate to Good | Excellent | High humidity, frequent wet-wash areas | Allows aggressive sanitation protocols |
You must choose based on your bakery's specific cleaning standard operating procedures (SOPs) and your daily slice volume. If sanitation teams use heavy water and chemicals near the slicer, stainless steel is mandatory. If you operate a dry line pushing thousands of identical loaves hourly, high-carbon steel provides better longevity.
The physical shape of the cutting edge determines how the metal interacts with the bread's crust and crumb. Selecting the wrong profile guarantees poor results, regardless of how sharp the blade is. Manufacturers engineer specific tooth shapes for specific bread densities.
Scalloped edges feature smooth, rounded curves along the cutting surface. These blades work best for soft, high-moisture breads like brioche, standard white loaves, and soft sandwich buns. The gentle wave of the scallop slices through the delicate crumb without grabbing or tearing the internal structure. It acts somewhat like a smooth knife, applying even pressure across a wider surface area.
Hard-crusted artisan breads require a completely different approach. Sourdough, crusty baguettes, and dense rye loaves demand initial crust penetration. A pointed, V-tooth serrated bread blade bites into the hard exterior immediately. The aggressive points pierce the tough crust, allowing the recessed gullets to clear away the resulting crumbs quickly. If you attempt to use a scalloped blade on artisan sourdough, the blade will bounce off the crust and crush the loaf.
Tooth pitch, measured in Teeth Per Inch (TPI), also plays a critical role. A lower TPI means larger teeth spaced further apart. A higher TPI means smaller, more densely packed teeth.
TPI Selection Chart:
Bread Characteristic | Recommended TPI Range | Crumb Generation Expectation |
|---|---|---|
Dense, heavily seeded loaves | Low (e.g., 1/4" pitch) | Moderate. Aggressive teeth clear large seeds easily. |
Standard crusty artisan | Medium (e.g., 3/8" pitch) | Low to Moderate. Balances penetration and smooth cutting. |
Delicate, soft sandwich crumb | High (e.g., 1/2" pitch) | Very Low. Small teeth prevent tearing soft interiors. |
As a rule of thumb, use lower TPI blades for dense, heavily seeded breads. The larger gullets handle seeds and nuts without jamming. Use higher TPI blades for delicate crumbs to ensure the smoothest possible finish. Keep in mind your crumb generation assumptions: highly aggressive teeth will naturally produce slightly more crumb waste, but they prevent the catastrophic crushing of tough crusts.
Purchasing the correct edge profile means nothing if the blade does not fit your machine perfectly. Commercial slicers require exact measurements. When ordering a replacement bakery cutting blade, you must measure the pin-to-pin or hole-to-hole center length precisely. Being off by even 1/8 of an inch causes complete operational failure. The blade will either refuse to mount or fail to tension correctly.
You must also identify the correct mounting style. Different machine manufacturers utilize different connection points. Pin-end configurations feature small cylindrical pins extending from the blade ends. Hole-end configurations require a mounting hook to pass through a punched hole in the steel. Rivet styles use a heavier, reinforced attachment point. Always check your slicer's manual or inspect the current blades before ordering.
Once installed, implementation risk centers entirely on proper tensioning. Tensioning dictates how rigid the blade remains during the cutting stroke. Both under-tensioning and over-tensioning create severe operational dangers.
Under-tensioning: Loose blades flex during operation. This flexing causes wavy cuts, drifting slice thicknesses, and excessive friction against the bread guides. The resulting vibration can loosen internal machine components.
Over-tensioning: Applying too much force stretches the metal beyond its elastic limit. Over-tensioned blades suffer premature snapping. They also place immense stress on the slicer's frame and bearing assemblies, leading to expensive mechanical breakdowns.
Best Practice: Always use a tension meter if your manufacturer provides one. Follow the specific torque specifications listed in your slicer manual. Tighten blades uniformly across the entire cutting frame to ensure equal load distribution.
Food production facilities operate under intense regulatory scrutiny. Your equipment choices must reflect these standards. You must verify your supplier provides a certified food grade slicer blade. This certification ensures the metal composition complies with FDA and NSF guidelines. It guarantees the materials will not leach toxic substances into the food supply. If the blades arrive pre-lubricated to prevent rust during shipping, you must ensure the manufacturer uses entirely non-toxic, food-safe lubricants.
Effective maintenance relies on proactive replacement protocols. Many bakeries make the mistake of waiting for visual cut degradation before changing blades. By the time you see ragged bread edges, you have already lost yield and overtaxed your slicer's motor. We recommend establishing a replacement schedule based strictly on hours of operation. Track the number of shifts a blade set runs. Once you determine the optimal lifespan for your specific bread types, schedule automatic changeouts slightly before that failure point.
Finally, consider supplier scalability. Your production relies on an uninterrupted supply of sharp blades. When evaluating a new bread slicer blade manufacturer, audit their inventory consistency. Ask about their standard lead times and their ability to handle emergency bulk orders. A supplier offering excellent metal quality but suffering from unpredictable shipping delays will create massive production bottlenecks for your bakery.
Blade selection requires carefully balancing material durability, specific tooth profiles, and precise machine tensioning. You cannot approach this process as a generic purchase. The right choices protect your yield, extend the life of your expensive slicing machinery, and ensure your loaves look perfect on the shelf.
Your next step should involve a physical audit of your slicing station. Inspect your current crumb waste levels and examine your existing blades for uneven wear patterns. Look closely at the edges of your finished bread to identify signs of tearing or crushing.
We prompt you to consult your slicer manufacturer's manual today to verify your exact length and tensioning requirements. Consider contacting a specialized commercial blade manufacturer to arrange a tailored trial, ensuring your next installation perfectly matches your daily bread varieties.
A: Due to the extreme precision of scalloped and serrated geometries, replacing them is standard industry practice. Sharpening alters the blade profile and changes its exact tensioning length. This alteration risks highly inconsistent cuts and causes significant machine damage. You should discard worn blades safely and install a fresh set.
A: Lifespan depends on several realistic variables. You can expect 3 to 6 months of use under standard conditions. Slicing hard artisan sourdough dulls edges much faster than processing soft pan bread. Shift durations and proper blade tensioning also heavily influence overall longevity. Regular inspections help determine your exact replacement cycle.
A: Crushing typically results from a completely dull edge, an incorrect tooth profile, or inadequate blade tension. You might be using a soft-bread scalloped blade instead of a highly aggressive serrated bread blade. Checking your tension settings and switching to a pointed V-tooth profile usually solves crust crushing immediately.


