
- Home
- Hot
- Products
- Application
- About Us
- Technical Guide
- News
- Contact Us
 English
Views: 0 Author: Site Editor Publish Time: 2026-10-28 Origin: Site


Operating a metal shear with a dull edge accelerates machine wear, increases tonnage requirements, and directly degrades cut quality. This leads to costly secondary operations to remove burrs or deformations. Facility managers and fabricators must decide whether to invest the labor and risk the tolerances of sharpening a shear blade in-house, or incur the downtime of sending it to a professional grinding facility. This guide breaks down the technical requirements for restoring a cutting edge. We evaluate the viability of in-house grinding versus professional services. You will also find a framework for minimizing downtime while protecting your tooling investment. We cover grinding wheel selection, coolant application, and precision shimming techniques required to maintain factory clearances.
Tolerance is Critical: Removing too much material or altering the factory cutting angle compromises the blade’s structural integrity and clearance settings.
Heat Management is Non-Negotiable: Improper grinding without adequate flood coolant will ruin the temper, leading to micro-cracking and premature failure.
Maintenance Benchmarks: Blades cutting mild steel typically require inspection and potential resharpening every 20–30 operating hours, whereas high-tensile materials demand more frequent intervals.
The Outsourcing Threshold: Shops lacking a dedicated surface grinder, a vertical mill with appropriate travel, or specialized knife grinders should default to professional sharpening to avoid catastrophic damage.
Identifying a dull edge early prevents catastrophic tooling failure. Physical signs manifest directly on the cutting surface. Look for rolled edges where the sharp corner has rounded over. Visible chipping indicates the steel has encountered material harder than its rating. Galling along the cutting surface shows material welding itself to the tool steel due to excessive friction.
Operational symptoms are equally obvious. You will notice excessive burr formation on the sheared material. The machine will require increased hydraulic pressure or tonnage to complete a standard cut. A louder-than-normal shearing action often sounds like a heavy snap or bang rather than a clean punch. These indicators mean the edge is pushing and extruding the metal rather than fracturing it cleanly.
Perform a routine visual inspection using these steps:
Wipe down the entire length of the upper and lower cutting edges with a clean rag and a safe solvent.
Run a brass scraper or a piece of heavy cardstock along the edge to feel for nicks or burrs. Never use your bare hands.
Inspect the sheared drop pieces. A clean cut should show a shiny penetration zone for about one-third of the material thickness, followed by a rougher fracture zone.
Measure the burr height on the sheared parts. If the burr exceeds 10% of the material thickness, the edges require immediate rotation or sharpening.
Running a dull hydraulic shear blade creates cascading mechanical failures. The machine must work harder to force a blunt edge through sheet metal. This places immense strain on hydraulic cylinders. Seals can blow out from pressure spikes. Hold-downs must grip tighter to prevent material from tipping, accelerating wear on the clamping system. The entire machine frame absorbs severe shock loads.
Hidden costs accumulate rapidly on the production floor. Material waste increases as cuts drift out of square. Edge deformations require manual labor to fix. Workers spend hours deburring parts with angle grinders before welding or forming can begin. This wasted labor quickly exceeds the cost of proper tooling maintenance. Furthermore, dull tooling exacerbates common shearing defects like camber, bow, and twist, rendering long strips of material unusable for downstream fabrication.
Standard geometry for most sheet metal applications relies on a 90-degree edge. This square profile allows the manufacturer to provide four usable cutting edges on a single rectangular bar. Some specialized applications require specific rake angles to reduce cutting force on thicker plates. Altering this factory angle during sharpening changes the shearing dynamics entirely.
If you grind a bevel into a 90-degree edge, you destroy the clearance requirements. The gap between the upper and lower tools must remain parallel. Changing the angle forces the material to fold or jam between the tools. Precision geometry dictates how cleanly the metal fractures during the stroke.
You cannot grind a tool indefinitely. Establish a strict baseline for how much metal can safely be removed. Machinists measure this in thousandths of an inch. Removing .005" to .010" is often enough to restore a rolled edge. Deep chips require more aggressive removal.
Original equipment manufacturers provide minimum width and thickness specifications. Once a tool reaches this minimum dimension, it becomes structurally unsafe. It risks snapping under heavy tonnage. To compensate for removed material, you must use precision shims during reinstallation. Shimming restores the factory cutting height and ensures the upper and lower edges bypass each other correctly.
Follow this standard shimming procedure:
Measure the newly sharpened tool with a precision micrometer at multiple points along its length.
Subtract this new dimension from the original OEM nominal dimension.
Select a full-length steel shim that exactly matches this difference. For example, if you removed .015" of material, use a .015" shim.
Place the shim behind or under the tool, depending on the machine design, ensuring it sits perfectly flat without any wrinkles or trapped debris.
Tool steel alloys dictate the grinding approach. High-carbon, high-chrome steels like D2 offer extreme wear resistance. They hold an edge well but are highly sensitive to thermal shock during grinding. Shock-resisting steels like S7 handle impact better. They resist chipping when cutting heavier plate but may lose their sharp edge faster on abrasive materials.
The alloy composition directly dictates your choice of grinding wheel. D2 often requires a highly friable aluminum oxide wheel or a specialized CBN (Cubic Boron Nitride) abrasive. The wheel must break down consistently to expose fresh, sharp grains. Incorrect wheel selection leads to loading, where metal particles clog the abrasive. This generates massive friction and heat.
Tool Steel Grade | Primary Characteristics | Grinding Wheel Recommendation | Heat Sensitivity |
|---|---|---|---|
D2 | High wear resistance, high carbon/chrome | Friable Aluminum Oxide or CBN | Extremely High |
A2 | Good balance of toughness and wear | Standard Aluminum Oxide | High |
S7 | Maximum shock resistance, lower wear | Aluminum Oxide | Moderate |
H13 | Hot work steel, resists thermal fatigue | Silicon Carbide or Aluminum Oxide | Moderate |
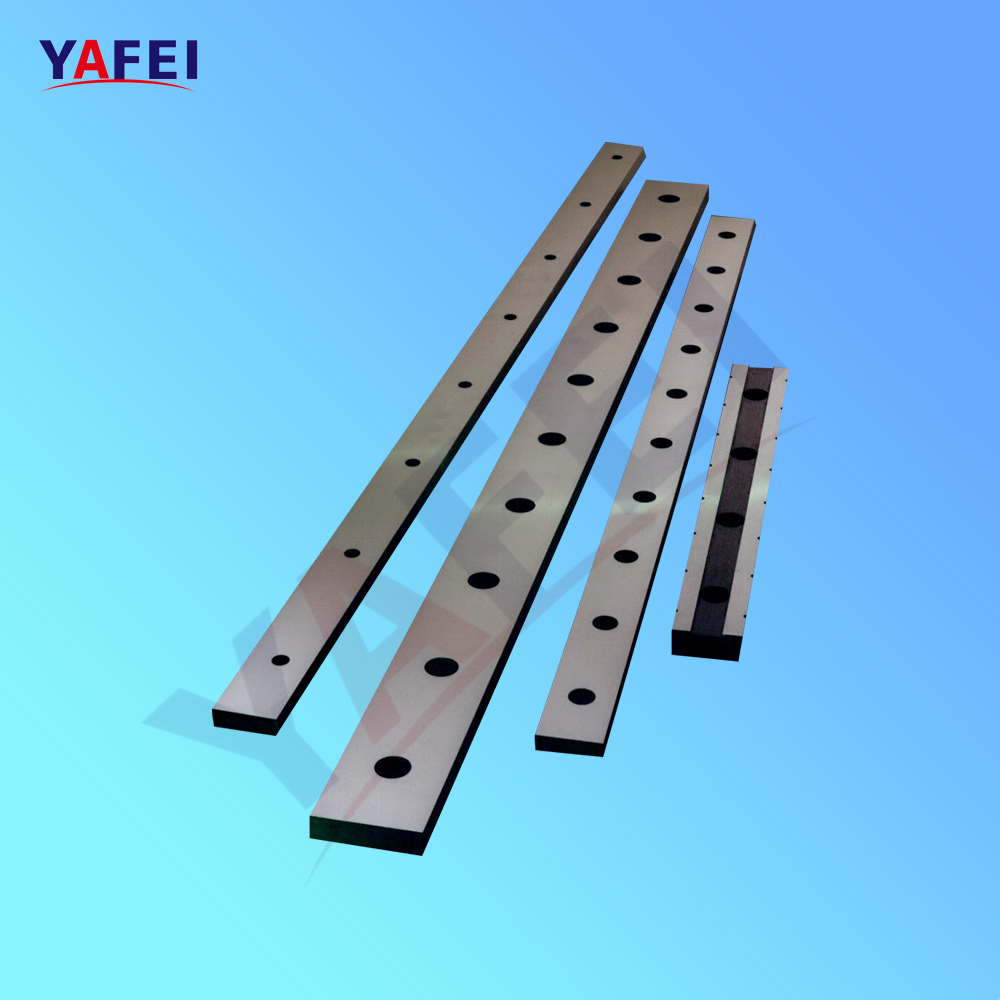
Assess your machinery before attempting this work. A standard surface grinder works well for short segments. A vertical mill equipped with a cup wheel can also suffice if operated by a skilled machinist. Machine travel limits dictate success. You might successfully sharpen a 3-foot segment on a vertical mill. A 10-foot or 12-foot tool requires massive table travel. This rules out standard machine shop equipment.
Alternative machinery includes dedicated grinding machines. Some shops adapt heavy-duty bed knife grinders originally designed for other industries. These machines handle long lengths while maintaining strict parallel tolerances. Hand-grinding or bench grinders are strictly prohibited for industrial applications. It is physically impossible to maintain a perfectly straight, parallel edge by hand.
Setup dictates the final quality of the edge. Carefully position the tool on the magnetic chuck. Use a dial indicator to ensure it sits perfectly flat and parallel. Stone the magnetic chuck first to remove any burrs or debris. Even a tiny piece of grit under the steel will bow the tool, resulting in an uneven grind.
Execute a highly controlled grinding pass strategy using these parameters:
Dress the grinding wheel with a sharp diamond tool to ensure a flat, clean abrasive surface.
Engage the magnetic chuck and verify the holding force. Block the ends of the tool with steel stops to prevent longitudinal shifting.
Turn on the flood coolant before the wheel contacts the steel. Ensure the nozzle directs fluid exactly at the cutting zone.
Take exceptionally light cuts. Aim for .0005" to .001" per pass. This slow material removal maintains control and prevents heat buildup.
Allow the wheel to spark out completely. Run several passes without feeding the wheel down to ensure a perfectly flat finish.
Demagnetize the tool thoroughly before removing it from the chuck. Residual magnetism will attract metal shavings during operation.
The primary risk of in-house sharpening is localized overheating. Excessive heat draws the temper out of the steel. This leaves soft spots that will roll over immediately upon the first cut. You might also cause micro-cracking, which leads to catastrophic failure under load.
Mitigate this risk through the mandatory use of light flood coolant. Use a high-quality synthetic or semi-synthetic water-soluble coolant mixed at the manufacturer's recommended ratio, typically 10:1 or 20:1. This prevents rust on the freshly ground surface while dissipating heat rapidly. Avoid using the incorrect wheel abrasive for the specific alloy. Never apply excessive feed rates to speed up the job. Rushing the process guarantees edge chipping and ruined tooling.
Specialists utilize industrial-grade equipment designed specifically for long tooling. They operate heavy-duty Blanchard grinders or specialized long-travel reciprocating knife grinders. These machines handle massive lengths without deflection. The rigid setup ensures the entire length of the steel remains perfectly straight.
Professional operators focus on removing the absolute minimum amount of material necessary. They evaluate the deepest chip or roll and grind just past that point. This careful approach maximizes the total lifespan of your metal shear blades. They understand the metallurgy and apply the exact wheel speed, feed rate, and coolant volume required.
Reputable facilities perform rigorous post-sharpening inspections. They often use magnetic particle inspection (Magnaflux) to check for hidden cracks. This non-destructive testing involves magnetizing the steel and applying iron particles coated in a fluorescent dye. Under ultraviolet light, even microscopic fractures caused by operational stress or previous heat damage become brightly visible. They also use precision measuring tools to ensure parallel tolerances end-to-end. You receive a certified tool ready for immediate installation.
Handling heavy tooling requires strict safety protocols. Never place your hands directly under the ram without proper blocking. Follow these safety and seating steps:
Execute full Lockout/Tagout (LOTO) procedures on the machine's electrical and hydraulic systems.
Block the ram securely using heavy timber or engineered steel blocks. Never rely solely on hydraulic pressure to hold the ram up.
Use threaded lifting holes and rated eye bolts to hoist the tools. Use a crane or forklift to maneuver them out of the machine.
Thoroughly clean the blade seat and anvil using a safe solvent. Stone the seating surfaces lightly to remove any raised burrs.
Install the shims and the sharpened tool. Hand-tighten the bolts initially.
Follow the proper sequence for torquing bolts. Start from the center and work your way outward toward the ends, alternating left and right. Use a calibrated torque wrench. Tighten to exact OEM specifications in three stages. For example, if the final torque is 150 ft-lbs, tighten all bolts to 50 ft-lbs, then 100 ft-lbs, and finally 150 ft-lbs. Over-tightening causes warping. Under-tightening allows the tool to shift under heavy shearing loads.
Clearance is the most critical adjustment. Use precision feeler gauges to reset the gap between the upper and lower tools. Base this clearance on the thickness and tensile strength of the material you plan to cut. Thinner materials require a tighter gap. Thicker plate requires a wider gap to allow for proper fracture mechanics.
Material Thickness (Mild Steel) | Recommended Blade Clearance (Gap) |
|---|---|
20 Gauge (.036") | .002" - .003" |
16 Gauge (.060") | .004" - .005" |
10 Gauge (.135") | .009" - .011" |
1/4 Inch (.250") | .017" - .020" |
1/2 Inch (.500") | .035" - .040" |
Check the gap at multiple points along the entire length of the machine. Adjust the bed or ram accordingly. Rotate the machine over by hand or in jog mode to ensure the newly sharpened edges perform optimally without colliding. A collision will instantly destroy the fresh grind.
Compare the immediate availability of an in-house repair against the processing time of an external vendor. In-house work gets the machine running the same day. Outsourcing requires shipping, processing, and return transit. This can leave a machine down for a week or more. Shipping heavy steel also requires building custom wooden crates to prevent transit damage, adding to the logistical burden.
Introduce the strategy of keeping a rotating spare set of tools. This eliminates production bottlenecks entirely. When one set dulls, you swap in the sharp spares immediately. The dull set ships out for professional service without impacting your production schedule.
Evaluate the true impact of doing this work yourself. Weigh the labor hours of your skilled machinists, the cost of specialized abrasives, and the high risk of operator error. Compare these internal burdens against the flat-rate fee of a professional service.
Professional sharpening often yields better long-term results. Specialists extend the overall life of the tool by removing less material per grind. This reduces the frequency of complete replacements, optimizing your operational efficiency.
Factor | In-House Sharpening | Professional Outsourcing |
|---|---|---|
Equipment Required | Large surface grinder or long-travel mill | None (handled by vendor) |
Turnaround Time | Immediate (1-2 days) | Standard shipping + processing (1-2 weeks) |
Risk of Heat Damage | High (depends on operator skill) | Very Low (specialized cooling systems) |
Tolerance Accuracy | Moderate (limited by machine travel) | Extremely High (guaranteed parallel) |
Labor Impact | Pulls machinists off other revenue tasks | Zero internal labor required for grinding |
Maximize usage before any grinding is required. Most standard profiles feature four usable edges. Provide strict guidelines for rotating these edges. Do not wait until an edge is completely destroyed before flipping it. A slightly dull edge requires minimal grinding to restore. A heavily chipped edge requires removing massive amounts of steel.
Establish a routine inspection schedule based on operating hours and material types. Mild steel generally allows for longer intervals between rotations. Stainless steel or high-tensile alloys work-harden during the cut, degrading the edge much faster. Log the hours and schedule rotations proactively.
Operator behavior directly impacts tooling longevity. Emphasize the importance of training operators to respect machine limits. Never allow operators to cut materials that exceed the machine's rated capacity. Shearing hardened materials like bolts, rebar, or heavy plate instantly chips the edge.
Train staff to keep the machine bed clean. Debris dragged across the lower tool causes premature wear. Ensure operators understand how to adjust the blade gap for different material thicknesses. Improper gap settings force the tool to work harder, accelerating edge degradation. Additionally, maintenance teams must regularly check the ram gib clearances. Loose gibs allow the upper ram to push away from the lower bed during the cut, simulating a dull edge and causing severe burring even with freshly sharpened tools.
Inspect your current cut quality immediately for signs of burring, edge rolling, or excessive machine tonnage.
Consult your machine’s OEM manual for minimum dimension tolerances and specific shimming requirements before attempting any grinding.
Evaluate your inventory of spare tools to establish a sustainable rotation schedule that prevents production bottlenecks.
Source a reputable industrial grinding service and build custom shipping crates before an emergency shutdown occurs.
A: Inspection and rotation should occur every 20-30 operating hours when cutting mild steel. High-tensile materials, stainless steel, or abrasive alloys accelerate wear and require more frequent intervals. Rotate edges at the first sign of rounding to minimize the material removed during grinding.
A: No. Hand-grinding or using a bench grinder is strictly prohibited. You cannot maintain the perfectly straight, parallel edge required for shearing. Attempting this will destroy the geometry, cause severe gaps, and potentially shatter the steel under tonnage. Always use precision grinding machinery.
A: Most standard profiles utilize a strict 90-degree square edge, allowing for four usable cutting sides. Some specialized applications use specific rake angles. Always check OEM specifications before grinding. Altering the factory angle ruins the shearing action and destroys the required clearance.
A: Machinists typically remove .005" to .010" per sharpening to restore a rolled edge. OEMs define a strict minimum width and thickness limit. Once the tool reaches this minimum dimension, it is unsafe to use. You must use precision shims during reinstallation to compensate for removed material.
A: Chipping during grinding usually results from using the wrong abrasive wheel for the specific tool steel alloy. Excessive feed rates, taking cuts that are too deep, or failing to dress the wheel properly also cause chipping. The wheel loads up with metal, generates massive friction, and fractures the edge.
A: Prevent heat damage by taking exceptionally light passes, typically .0005" to .001" per pass. Continuous, heavy flood coolant directed exactly at the point of contact is mandatory. Overheating draws the temper out, leaving soft spots that fail immediately during operation.


